

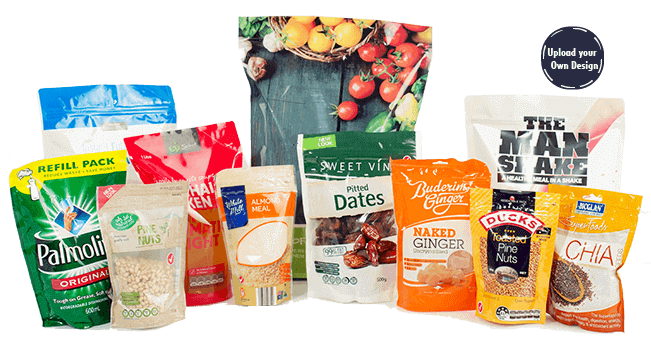
Creating Custom Mylar Bags With Logo involves several steps to ensure that the final product meets your needs. Mylar bags are popular for packaging due to their durability and ability to preserve contents. Additionally, their customizable nature allows brands to showcase their identity effectively. In this guide, you will learn the necessary steps to design and produce these bags.
Understanding Mylar Material
What is Mylar?
Mylar is a type of polyester film that is known for its strength and flexibility. For this reason, it is often used in various packaging applications, including food storage, cosmetics, and other consumer goods. Mylar bags provide an excellent barrier against moisture, light, and oxygen, making them ideal for preserving products.
Benefits of Mylar Bags
Using Mylar bags offers several advantages. Firstly, they protect contents from environmental factors that can cause spoilage. Moreover, their lightweight design makes them easy to transport and store. Consequently, many businesses prefer Mylar bags for packaging due to their effectiveness and efficiency.
Designing Your Custom Mylar Bags
Step 1: Choose the Size and Shape
Selecting the appropriate size and shape for your Mylar bags is crucial. Consider the products you will be packaging. If you are packaging snacks, small bags may suffice, while larger items will require bigger sizes. Custom shapes can also make your product stand out on shelves.
Step 2: Create Your Design
Once you have decided on the size, it is time to design your bag. Utilizing design software like Adobe Illustrator or Canva can help you create an attractive layout. Moreover, include your logo prominently on the bag to increase brand recognition. Be sure to choose colors that align with your brand’s identity for a cohesive look.
Step 3: Choose the Printing Method
After finalizing your design, consider which printing method to use. Options include flexography, digital printing, or screen printing. Each method has its pros and cons, so it is essential to choose one that fits your budget and quality requirements. In addition, discuss your needs with a printing professional to make an informed decision.
Manufacturing Custom Mylar Bags
Step 1: Select a Manufacturer
Finding a reliable manufacturer is vital for producing high-quality Mylar bags. Research various companies that specialize in custom packaging. Furthermore, look for reviews or testimonials to gauge their reputation. Once you have shortlisted potential manufacturers, reach out for quotes and information about their services.
Step 2: Discuss Your Requirements
Once you have chosen a manufacturer, it is essential to communicate your requirements clearly. This includes details like bag size, design specifications, and quantities. Moreover, ask about the materials they use to ensure they align with your standards. Providing all necessary information upfront can help avoid misunderstandings later.
Step 3: Review Samples
Before finalizing your order, request samples of your custom Mylar bags. This allows you to check the quality, design, and overall appearance. Additionally, reviewing samples gives you a chance to make adjustments if necessary. Once you are satisfied with the samples, you can proceed with placing your order.
Finalizing Your Custom Mylar Bags
Step 1: Place Your Order
After reviewing the samples, you are ready to place your order. Ensure that you confirm all details, including quantities, pricing, and delivery timelines. Furthermore, ask about the payment options available. A clear agreement can prevent any potential issues down the line.
Step 2: Quality Control
When your custom Mylar bags arrive, conduct a quality control check. Inspect the bags for any defects, such as printing errors or physical damage. If any issues are found, contact the manufacturer immediately to address the concerns. Quality control is essential to maintain a professional image for your brand.
Using Your Custom Mylar Bags
Step 1: Fill the Bags
Once you have received your Mylar bags, it’s time to fill them. Make sure the contents are prepared and ready for packaging. For example, if you are packaging food, ensure that it is fresh and free from contaminants. Proper handling during this step can help maintain product quality.
Step 2: Seal the Bags
Sealing the Mylar bags is crucial for preserving contents. Various methods can be used, including heat sealing or using adhesive seals. Moreover, ensure that each bag is sealed properly to prevent air or moisture from entering. A tight seal will enhance the longevity of the product inside.
Step 3: Label Your Bags
Adding labels to your custom Mylar bags can provide essential information about the contents. Consider including the product name, ingredients, and usage instructions. Additionally, incorporating barcodes can assist with inventory management. Clear labeling helps consumers make informed choices and adds professionalism to your packaging.
Conclusion: Canadian Custom Packaging
In summary, creating custom Mylar bags with a logo involves careful planning and execution. From selecting the right material and size to designing, manufacturing, and using the bags, each step is vital for success. Additionally, ensuring quality control and clear communication with your manufacturer can lead to positive outcomes. By following these guidelines, you can produce Mylar bags that effectively represent your brand while maintaining the integrity of your products. Partnering with experts in Canadian Custom Packaging can further improve your results, ensuring high-quality solutions that cater to your specific needs.
More Stories
PVD-Coated vs. Traditional Furniture: Who win?
PCD Pharma Franchise Company in Baddi: Oasis Bio Bloom
Brass Hose Fittings: Perfect for Any Industry